Particles are an essential feature of Minecraft: They signify certain events, make the game more aesthetically pleasing, and they can be utilized by servers for special circumstances. Despite all of their different features, Minecraft particles are frustratingly unable to be edited in-game—besides the generic animations tab in Minecraft’s video settings. But what if there was a way to easily customize all of Minecraft particles directly through an in-game interface? Not to worry, Lunar Client’s Particle Changer mod does just this!
How to use Particle Changer Mod
To begin using the Particle Changer mod, ensure that you have downloaded Lunar Client by visiting https://www.lunarclient.com/download and downloading the appropriate installer according to your operating system. Once you’ve downloaded the Lunar Client installer, run the file and follow the prompts on screen—the Lunar Client Launcher will automatically open once you’ve finished installing Lunar Client. After you’ve opened the Lunar Client Launcher, all you need to do now is press the bright green Launch button in the middle of the screen.
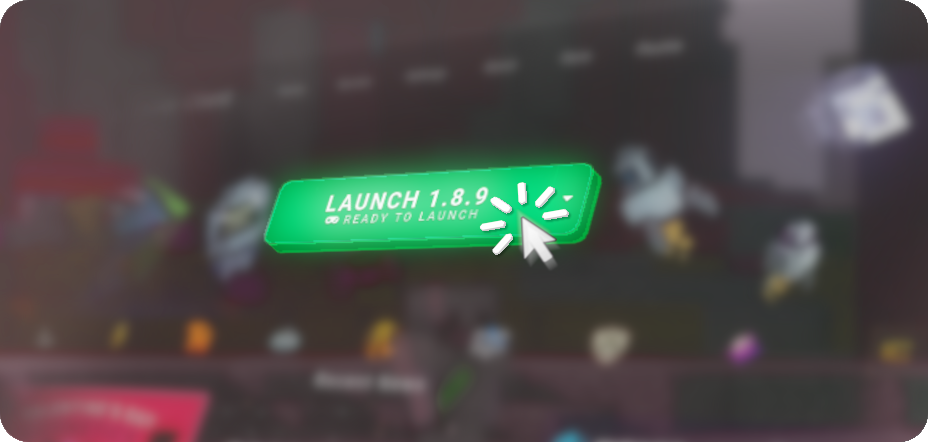
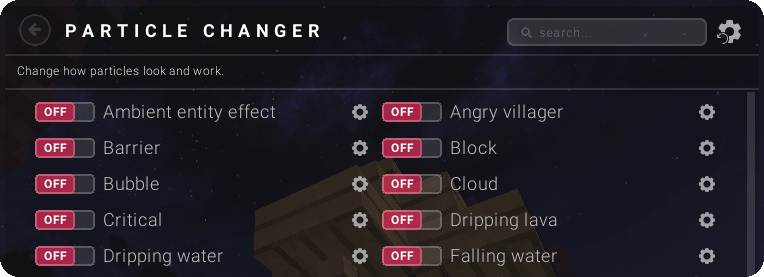
Pressing the Launch button will launch Lunar Client. To access the Particle Changer mod on Lunar Client, join a Minecraft server, realm or world and press the RShift button on your keyboard. Next, you’ll need to press the Mods button and then search for the Particle Changer mod using the search bar at the top right. You can enable the Particle Changer mod by clicking on the toggle to enable it. After the mod has been enabled, you’ll want to click on the settings button to access the Particle Changer mod’s settings so that you can enable the Particle Changer mod for all of the particles that you wish to use the mod on. Furthermore, the Particle Changer mod has a broad range of customization options for every particle in Minecraft, which we will cover below.
After going into the Particle Changer mod’s settings, you’ll notice a large list of different particles, which you can toggle on or off. Particles that are toggled on will be modified via the Particle Changer mod.
Particle Customization
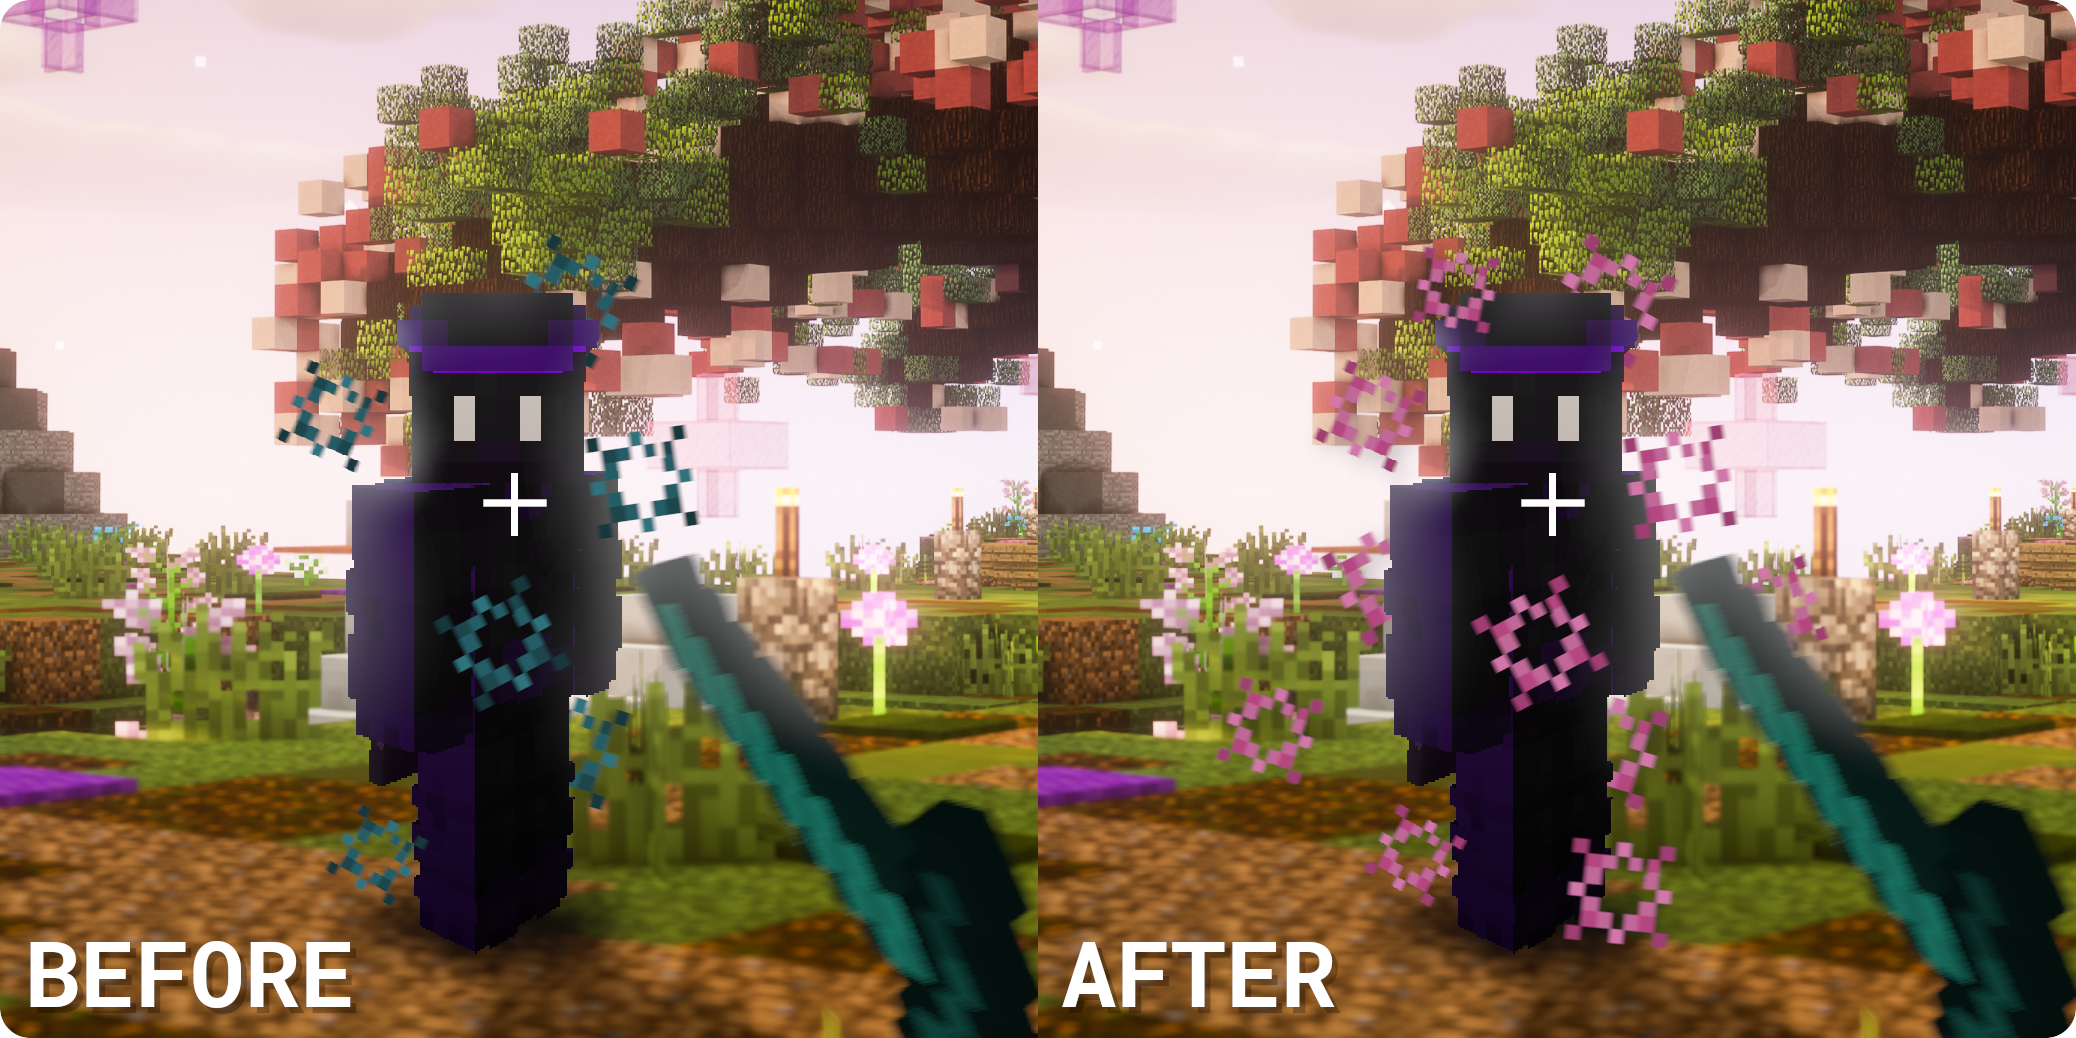
To begin customizing a particle, ensure that it is enabled and then click the gear icon next to the particle. This will open a menu that will contain various modification options for the particle that you’re editing, such as Color, Scale, Multiplier, and more.
Pressing on the Color option will open a color selector from which you can change the particle’s color to anything that you wish—you can even add a chroma effect to the particle! The Overlay Color will overlay the color onto the particle so that it blends into the particle, making it look a lot nicer. The Scale slider changes the size of the particle in-game while the Multiplier slider increases or decreases the number of particles that are shown. Finally, the Hide Particle option will simply hide the particle in-game. Another feature of the Particle Changer mod is the Always Show Sharpness toggle. When enabled, this option makes your Minecraft always display the sharpness particle when you hit an entity. Unfortunately, this option is only available for sharpness particles.
One thing to note is that if you wish to change the Scale or the Intensity of a particle, the Particle Changer will also modify the color of the particle. To get around this, you can either set the color to transparent using the transparency slider inside of the Color option, or you can set the color to white and enable Overlay Color.
Now that you’ve learned how to use the Particle Changer mod on Lunar Client, you’ll no longer have to change texture packs because you don’t like the particles! If you have any questions, don’t hesitate to reach out to our support team.